Ask Ayurvedic doctor a question and get a consultation online on the problem of your concern in a free or paid mode. More than 2,000 experienced doctors work and wait for your questions on our site and help users to solve their health problems every day.
FREE! Ask Ayurvedic Doctors 24/7
Body DetoxEar, Nose, and Throat DisordersGeriatrics & RejuvenationImmunodeficiencyInfertility TreatmentNutritionOrthopedic DisordersPediatricsRespiratory DisordersSexually Transmitted Diseases (STDs)Surgery RecoveryUrological DisordersVascular DisordersDental DisordersEndocrinological DisordersGastrointestinal DisordersYoga TherapyGeneral MedicineAllergic DisordersCardio DisordersGynecology and ObstetricsCosmetologySkin and Hair DisordersEye DisordersInfectious DiseasesMental DisordersNeurological DisordersOncologyPanchakarmaSexual Health & DisordersSports Medicine
Published on 06/16/25
(Updated on 06/26/26)
6,971
How to Make Abhyanga Oil at Home: Ayurvedic Massage Guide

If you've ever wondered how to make abhyanga oil at home or questioned what ingredients actually go into a high-quality ayurvedic massage oil, you're not alone. With the rise of holistic self-care and the revival of ancient wellness traditions, more people are rediscovering the powerful benefits of abhyanga — a deeply nourishing, daily oil massage rooted in Ayurveda. This guide is your practical go-to for making and using abhyanga oil at home, complete with a recipe, tips, and the science-backed advantages of incorporating this practice into your routine.
We'll dive into abhyanga oil benefits, its traditional roots, and the best abhyanga oil ingredients to match your dosha type. Whether you're new to Ayurveda or already smearing sesame oil on your body like a pro, this article will help you elevate your self-care game and feel more grounded, inside and out.
What Is Abhyanga and Why It’s Important in Ayurveda
Meaning and Role of Abhyanga in Daily Routine
Abhyanga (pronounced uhb-yung-uh) isn’t just a fancy term for a massage. In Ayurveda, it's considered a core part of dinacharya, or daily routine — almost as essential as brushing your teeth. This therapeutic practice involves massaging warm, herb-infused oil all over the body. The goal? To balance the doshas (Vata, Pitta, and Kapha), promote circulation, calm the nervous system, and keep skin youthful and vibrant.
In fact, some ancient Ayurvedic texts suggest doing abhyanga daily. Not just when you're stressed or sore, but every single morning before your shower. It's not always realistic (let’s be honest), but even doing it 2-3 times a week can make a big difference.
Abhyanga Oil Benefits for Body, Mind, and Skin
You might be wondering: why go through the effort of learning how to make ayurvedic massage oil at home when you can buy something off the shelf? The answer’s in the benefits. Homemade oil is personalized, free from synthetic chemicals, and tailored to your specific dosha.
Here are a few standout abhyanga oil benefits:
-
Boosts circulation and helps detoxify the lymphatic system.
-
Calms anxiety and promotes better sleep.
-
Moisturizes dry skin, reduces flakiness, and slows signs of aging.
-
Supports muscle recovery and reduces fatigue or stiffness.
And on a deeper level? Regular abhyanga can help bring a sense of presence and calm into your everyday life. It's not just body care — it's soul care. (Cheesy? Maybe. But it’s true.)
What Oil to Use for Abhyanga by Dosha Type
So, you’re on board with the practice. Now you're probably asking: what oil to use for abhyanga?
Different doshas require different oils to stay balanced. Here’s a super basic guide:
-
Vata (air + space): Use warm, heavy oils like sesame or almond. They’re grounding and warming, perfect for dry or anxious folks.
-
Pitta (fire + water): Cooling oils such as coconut or sunflower are ideal. They soothe inflammation and heat in the body.
-
Kapha (earth + water): Lighter oils like mustard or flaxseed stimulate circulation and prevent stagnation.
Feeling ambitious? You can mix oils to suit your dual-dosha constitution. A little trial-and-error goes a long way here — don’t stress about perfection.
Common Herbs and Ingredients in Abhyanga Oil
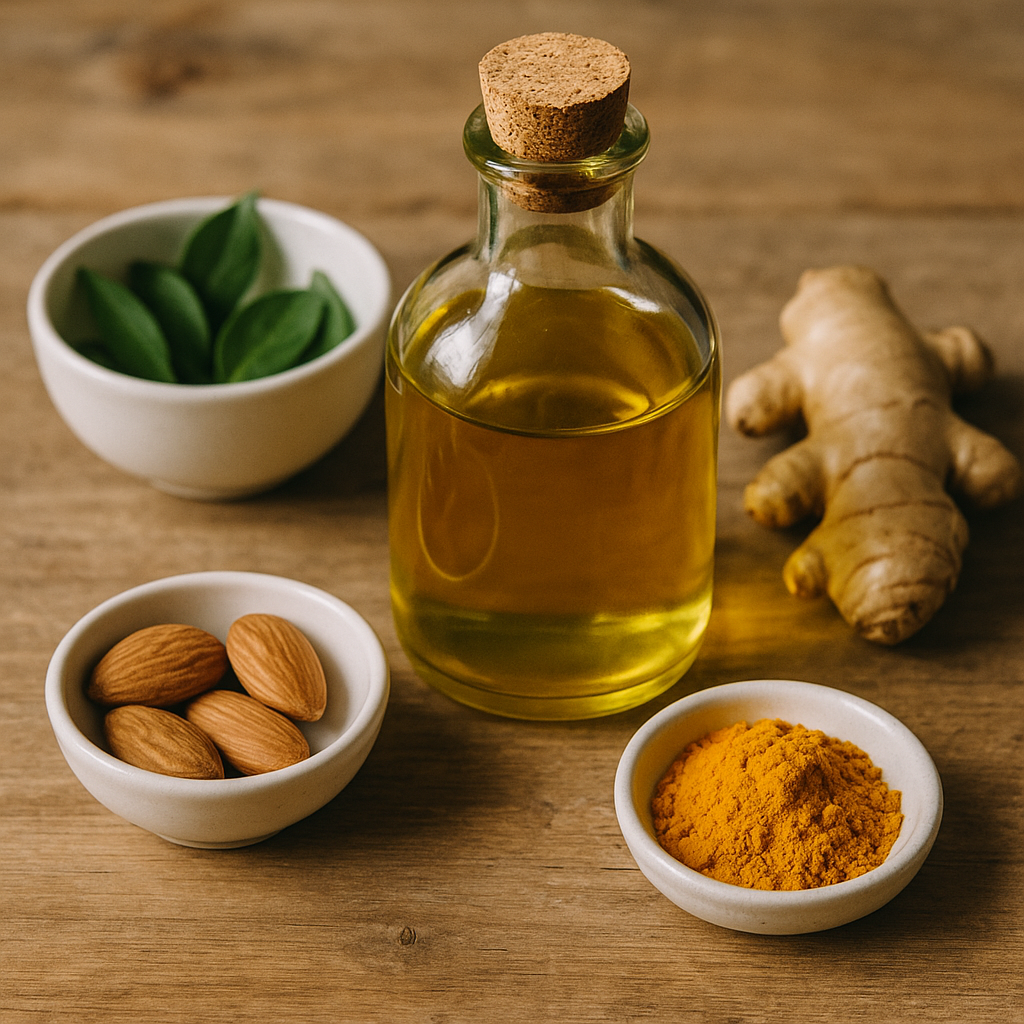
When creating your abhyanga oil recipe, consider these Ayurvedic herbs to level up the healing power:
-
Ashwagandha – rejuvenates and strengthens muscles.
-
Brahmi – calms the mind, great for mental clarity.
-
Turmeric – anti-inflammatory, ideal for skin.
-
Neem – antifungal and antibacterial.
-
Manjistha – supports lymphatic detox and brightens the skin.
You can either add these in powdered form during the oil-prep stage or get them as herbal extracts. Just make sure to strain properly afterward — gritty oil isn’t the vibe.
Safety Tips for Sensitive or Allergic Skin
Before you dive into your DIY adventure, a quick but important note: test the oil on a small patch of skin first. Just because it’s natural doesn’t mean it’s irritation-free. Everyone’s skin is different. Especially when using strong herbs or essential oils, sensitivity can pop up unexpectedly. Also, if you're using homemade abhyanga oil on children or during pregnancy, it's always best to consult with a trained Ayurvedic practitioner.
How to Make Abhyanga Oil at Home
So now that you’re ready to make your own Ayurvedic massage oil, let’s walk through the process. Making abhyanga oil at home might sound complicated at first, but it’s surprisingly simple once you get the hang of it. Plus, the smell of warm herbs and oils filling your kitchen? Kind of magical. Way better than most store-bought stuff, to be honest.
Abhyanga Oil Recipe: Ingredients and Quantities
Here’s a basic abhyanga oil recipe that you can customize based on your dosha or what you have on hand. These quantities make about 200ml of oil, which should last 2–3 weeks with regular use.
Base Oil (choose based on your dosha):
-
100ml Sesame oil (good for Vata)
-
or 100ml Coconut oil (good for Pitta)
-
or 100ml Mustard oil (good for Kapha)
Herbs (use any combo of these, or others depending on your needs):
-
1 tsp Ashwagandha powder
-
1 tsp Turmeric powder (careful—it stains!)
-
1 tsp Manjistha powder
-
1/2 tsp Neem powder (optional, it has a strong scent)
-
1 tsp Brahmi powder
Optional:
-
A few drops of essential oils like lavender or frankincense for aroma
-
Vitamin E oil for skin nourishment
These are commonly used abhyanga oil ingredients, but feel free to experiment. Ayurveda is big on personalization, so trust your instincts. Just avoid dumping in everything at once — too many strong herbs can make the oil harsh.
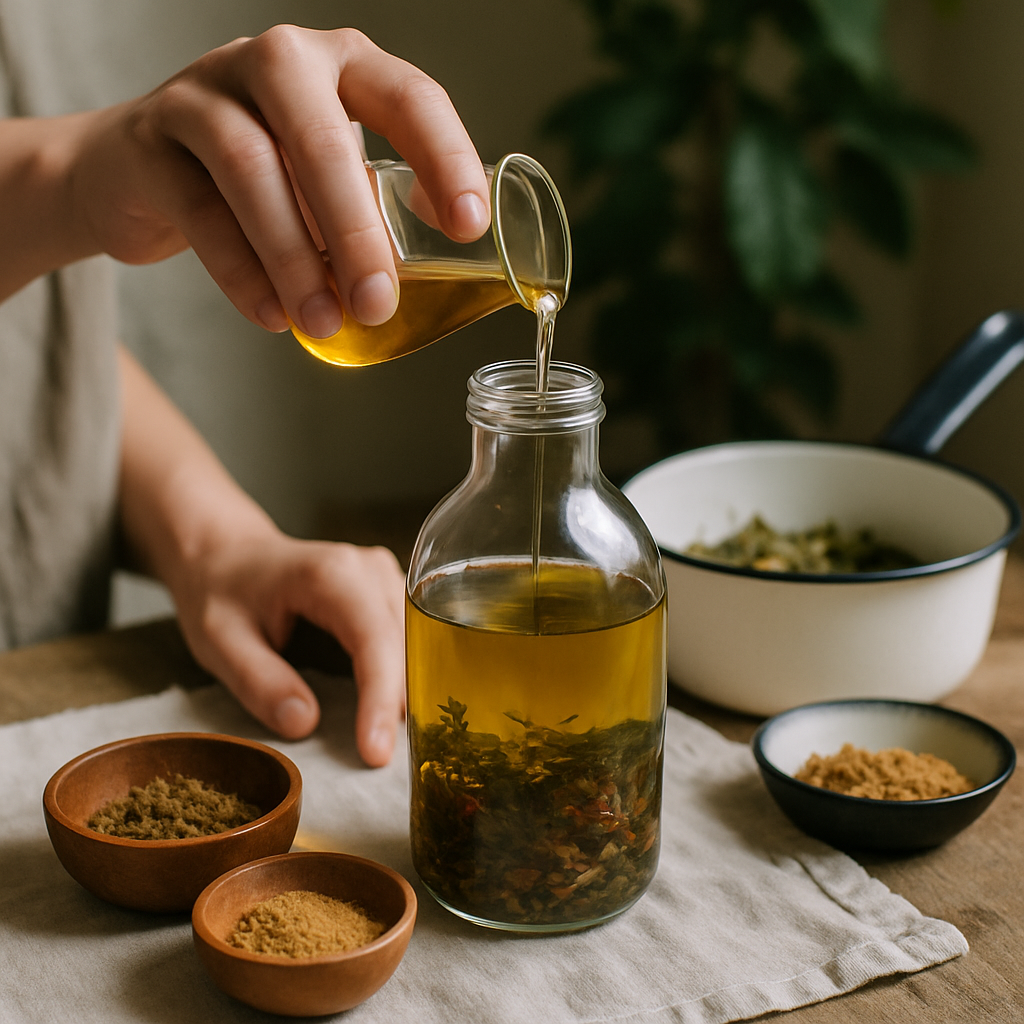
Step-by-Step Instructions for Preparing the Oil
Alright, let’s make your oil. Grab a saucepan, a sieve or muslin cloth, and a clean glass bottle or jar for storage.
-
Warm the base oil over low heat. Don’t boil it — you just want it gently heated.
-
Add your chosen herbs and stir. Keep the heat low and let the mixture simmer for about 30–40 minutes. Stir occasionally.
-
If you see bubbling or any weird smell, reduce the heat. You’re aiming for slow infusion, not deep frying your herbs. (Been there... not ideal.)
-
Once the oil turns darker and aromatic, remove it from the heat and let it cool slightly.
-
Strain it through a cheesecloth or fine strainer into a clean bowl or directly into your storage jar.
-
Add any essential oils or vitamin E if you like, then seal the jar and label it with the date.
That’s it — your DIY abhyanga oil is ready!
Store it in a cool, dry place away from sunlight. It should stay good for a month or two. If it starts smelling off or weirdly sticky, it’s time to toss it and make a new batch.

Don't wait or self medicate. Start chat with Doctor NOW
How to Use Abhyanga Oil for Massage
Knowing how to use abhyanga oil is just as important as making it. The technique and timing can seriously affect how effective the whole thing is — and how relaxed you feel afterward.
Daily Routine and Timing for Best Results
Traditionally, abhyanga is done in the morning before your shower. It’s meant to wake up the body, stimulate the lymph system, and prepare you mentally for the day.
But honestly? Life’s hectic. If your only window is a nighttime wind-down, that’s still way better than not doing it at all. Just don’t apply it right before bed unless you plan to rinse it off — otherwise, your sheets are going to be, uh… permanently moisturized.
Application Method: Head to Toe
Start with a small amount of warm oil (you can heat it in a double boiler or just rub it between your hands).
-
Scalp first — massage in circular motions.
-
Face and ears — gentle strokes, avoid getting oil in your eyes.
-
Neck and shoulders — use upward and outward strokes.
-
Arms and legs — long strokes along the limbs, circular over joints.
-
Abdomen and chest — clockwise circles over the belly; gentle strokes on the chest.
Massage for at least 10–15 minutes, longer if you’ve got the time. The more regular the routine, the more you’ll notice the benefits.
How Long to Keep the Oil Before Bathing
After the massage, let the oil sit for 15–30 minutes. Use that time to meditate, do breathwork, or even just chill with a book or podcast. Let the oil soak in and work its magic. Then shower using mild soap — or if you’re hardcore, just warm water to retain more of the oil's moisture.
Conclusion
Creating and using your own abhyanga oil at home isn't just about following some old Ayurvedic tradition — it's about reclaiming slow, intentional care in a world that constantly rushes us. Whether you’re drawn in by the physical perks (smoother skin, better sleep, relaxed muscles) or the deeper emotional grounding, abhyanga oil benefits are far-reaching.
When you take the time to learn how to make ayurvedic massage oil at home, you not only avoid unnecessary chemicals found in commercial products, but you also create something entirely unique to you. Your body, your dosha, your healing.
To recap real quick:
-
Choose your abhyanga oil ingredients based on your dosha and specific needs.
-
Use a base oil (like sesame, coconut, or mustard), simmer with herbs, and strain well.
-
Apply warm oil from head to toe, wait 15–30 minutes, then rinse with a warm shower.
-
Make it a regular part of your routine — even just twice a week can make a difference.
Oh, and don’t forget — your first batch might not be perfect. The herbs might clump, or you might forget to strain it properly (been there, done that). No big deal. You’ll get better at it, and your body will thank you for even trying.
Give it a shot, share your experience, and maybe even invite a friend to join you in the practice. This isn’t just about skincare — it’s self-connection.
FAQs
How often should I do abhyanga with homemade oil?
Ideally, daily — especially in the morning. But realistically? Start with 2 to 3 times a week and see how your body responds. If you're dealing with stress, insomnia, or dryness, doing it more often can really help.
Can abhyanga oil be used for head massage?
Absolutely, yes. In fact, Ayurvedic head massage (shiro abhyanga) is incredibly beneficial. Just remember to use a smaller amount (so you don’t end up drenched), and let it soak in for at least 20 minutes before washing. Sesame or Brahmi-infused oils are great choices for calming the mind.
How long can I store homemade abhyanga oil?
If stored in a clean, airtight glass jar away from direct sunlight and moisture, your homemade abhyanga massage oil should last around 4 to 6 weeks. Adding vitamin E oil or essential oils with natural preservative qualities (like tea tree or lavender) can extend shelf life a bit longer.
If the oil smells funky, changes texture, or looks cloudy — toss it and whip up a fresh batch.
Final Thoughts
If you’ve made it this far, you now know not only how to make abhyanga oil at home, but how to personalize it, use it effectively, and make it a legit part of your self-care routine. The beauty of this practice isn’t in getting it perfect — it’s in doing it at all.
So why not try it today? Set aside 30 minutes this week, gather your abhyanga oil ingredients, and give yourself the kind of care that doesn’t come in a rush. Trust me, your nervous system will thank you.
Questions from users
Can I use abhyanga oil on my baby's skin safely?
Henry
23 hours ago
You can use abhyanga oil on your baby's skin, but it's super important to be cautious. Babies have super sensitive skin, so it's best to consult with a trained Ayurvedic practitioner first, they can guide you on suitable ingredients and ensure it's safe for your little one. Hope that helps!
What is the best time of day to do abhyanga for maximum relaxation benefits?
Reid
10 days ago
Best time for abhyanga is usually in the morning before your bath, but really anytime that fits your schedule is good. Mornings are great for boosting energy and agni for the day. But if your only slot is nighttime, that's okay too; it’s super relaxing to unwind before bed. Regular routine really maximizes benefits!
How to properly heat abhyanga oil without damaging its beneficial properties?
Rory
19 days ago
Just heat the oil gently on a low flame. You want it just warm, not hot. Keep an eye on it, if you see bubbling or it smells off, turn the heat down. You can also use a double boiler for more control, or even a warm water bath, so it's never too hot. It helps keep the herbal goodness intact.
Can I use abhyanga oil on my hair, and what benefits would it provide?
Lindsey
28 days ago
Yes, you can totally use abhyanga oil on your hair! It nourishes the scalp, strenghthens the hair roots, and can promote healthier, shinier hair. Just warm it slightly and massage into your scalp before washing. Keep in mind though, the type of oil matters, depends on your dosha - sesame for vata, coconut for pitta, etc. Enjoy the pampering!
Is it safe to do abhyanga every day, or should I take breaks?
Ella
37 days ago
It’s generally safe to do abhyanga every day if your body feels good with it, like your daily rejuvenation moment. But it's good to listen to your body; if it feels too oily, sticky, or like it's too much, then take a break every once in a while. Try adapting it to your dosha needs too—Vata types often benefit from daily abhyanga, while Kapha may need it less often.
What is the best way to prepare for an abhyanga massage at home?
Luke
47 days ago
To prep for an abhyanga massage at home, warm your chosen oil slightly (not too hot!) to allow it to penetrate your skin better. Ideally do it before a shower. Make sure your space is warm and comfy, maybe play some soothing music. It's a great balance between self-care and therapy, just take it slow and enjoy.
Can I use homemade abhyanga oil as a moisturizer for my face?
Aubrey
57 days ago
You can definitely use homemade abhyanga oil on your face, but just be cautious. Facial skin can be sensitive, and such oils might be a bit too heavy. Maybe test it on a small area first or consider using a lighter oil, like jojoba or almond, which are more suited for facial use! Just be sure to avoid getting it in your eyes! 😊
How to make homemade abhyanga oil for dry skin?
Chloe
66 days ago
For homemade abhyanga oil for dry skin, try using sesame or almond oil as a base. You can infuse it with warming herbs like ashwagandha or warming essential oils like lavender or geranium. Warm the oil slightly before using it for best results. Remember to consider your dosha type too! Dry skin often indicates a Vata imbalance.
Can I use leftover herbs from making abhyanga oil for other wellness purposes?
Meredith
76 days ago
Totally! You can def use leftover herbs from making abhyanga oil for other stuff, like a relaxing herbal bath or potpourri. Just keep in mind, they may have lost some potency, so they might not be as effective in teas or decoctions. Still, a great way to enjoy the fragrant benefits and keep the good vibes going! 😊
Is it safe to use abhyanga oil on sensitive skin?
Nora
86 days ago
Abhyanga can be good even for sensitive skin, but it's key to choose the right oil. Use lighter oils like coconut or sunflower if your skin's sensitive. Patch test it first on a small area, just to be sure no reactions pop up. If you add essential oils, use 'em sparingly. Listen to your skin; it's pretty smart!
Related articles

Body Detox
How to Make Barley Water for Weight Loss: Ayurvedic Guide
Learn how to make barley water for weight loss, when and how much to drink, and its Ayurvedic benefits. Discover tips and best practices for effective results
5,801

Body Detox
Punarnavadi Guggulu Benefits, Dosage, Ingredients, Side Effects
Exploration of Punarnavadi Guggulu Benefits, Dosage, Ingredients, Side Effects
3,000

Body Detox
Sookshma Triphala: A Potent Ayurvedic Blend for Holistic Wellness
Sookshma Triphala is a versatile and potent Ayurvedic remedy that supports holistic health. Its ability to detoxify, rejuvenate, and balance bodily functions makes it a valuable addition to your wellness routine.
2,544
 - Ask Ayurveda Image")
Body Detox
How to Remove Excess Vata from the Body (Without Going Completely Off-Grid)
So what is Vata, exactly? In Ayurvedic terms, Vata is one of the three doshas—vital energies that govern the body and mind. Vata is associated with air and space. When it's in balance, you feel creative, light, energized, enthusiastic. When it's out of wh
4,351

Body Detox
What Is Supari: Ayurvedic Uses, Benefits, and Risks
Learn what is supari, its benefits, side effects, and types. Explore betel nut effects, uses in Ayurveda, types of supari, and differences from nutmeg
20,239

Body Detox
Dasamoolakatutrayam – Natural Ayurvedic Respiratory Relief & Detoxification
Discover the benefits of Dasamoolakatutrayam, an Ayurvedic herbal blend used to treat respiratory issues like chest congestion, cough, and asthma. Learn about its components, usage guidelines, and precautions.
2,610

Body Detox
Vata Body Type: How Ayurveda Can Help You Feel Grounded, Energized, and Balanced
So, let's get this straight: if you've ever felt like you're all over the place — a whirlwind of ideas, emotions, energy (and sometimes exhaustion) — you might just have a Vata body type. In Ayurveda, Vata is all about movement. Think: air, wind, lightnes
2,537

Body Detox
What Is Ayurveda? Ancient Wisdom for Modern Wellness
What is Ayurveda? Discover its meaning, doshas, and philosophy. Learn how this ancient holistic system brings balance to mind, body, and modern life
1,962

Body Detox
Panchakola Choornam Benefits, Dosage, Ingredients, Side Effects
Exploration of Panchakola Choornam Benefits, Dosage, Ingredients, Side Effects
2,337

Body Detox
So... What Is Pitta in the Human Body Anyway?
Ever heard someone casually mention their “Pitta” being out of balance — and you just smiled, nodded, and mentally filed it under “probably some new-age thing”? Totally fair. But here’s the thing: Pitta isn’t just spiritual fluff. It’s actually a centra
2,416
Related questions on the topic
Legal
Additional Documents
© 2024 Ask Ayurveda. All rights reserved.